
Making Your First Kokedama Moss Balls

Getting to know kokedama
Kokedama originated from Japan where bonsai plants were grown in moss-covered spherical balls made of soil. Loosely translated, ‘koke’ means moss and ‘dama’ means ball. The original Japanese form of kokedama had miniature sculptured trees displayed on an altar-like platform or artistic pieces of driftwood.
Today, kokedama in its modern form has taken over parts of the world by storm.
On the Internet, numerous do-it-yourself articles and videos abound. Creative designers and gardeners have even tied strings on the balls so that they can be suspended in mid-air. A display of several such dangling moss-balls is called a ‘string garden’. These spherical novelties make wonderful personalised gifts as well as great accents and conversational pieces for homes.
Simple steps to making your first kokedama
Creating your own kokedama is a relatively simple process. It involves transplanting a plant into clayey soil that has been moulded into a spherical shape and covered with moss. Strings are then twined round the ball to secure the moss.
Sounds easy? There are two considerations that need to be taken into account when making your kokedama.
Getting the ball right
It is important to get the composition of soil for the sphere right. Clayey soil is generally preferred as it holds well, but soil amendment additives like compost or peat moss need to be added to make the clay porous enough for the roots to breathe.
Obtaining the correct type and combination of soil and amendments to yield a suitable growing mix can be a little tricky for beginners, but with some practice and experience, it will get easier. A simpler alternative is to use spherical floral foam balls. As they are already of the correct shape, one just needs to select a ball of the desired size and soak it in water before use. A planting hole to fit the root ball of the selected plant is created by cutting into the foam.
Selecting the right plants
1) Choose plants that are more forgiving when their root balls are separated into smaller ones. It can be traumatic for the plants when removing most of the soil around their roots as it may result in damage to their root systems. This would then lead to transplant shock.
2) It is vital to select a plant that can thrive in the amount of light available at the display site.
3) Cacti or other moisture-sensitive plants featured in some online projects may prove tricky to grow in the long run. That is because whether made from clayey soil mix or floral foam, the kokedama sphere will retain a significant amount of water. Withholding water for such plants will only damage their roots and affect their health.
Furthermore, dried-out clay can be difficult to re-wet again. Common house plants which can take a bit more moisture, for example, the Money plant (Epipremnum aureum), Heart Leaf Philodendron (Philodendron hederaceum) and a young plantlet of the Elephant Ear (Alocasia macrorrhizos) can be used. Dracaenas such as the Lucky Bamboo (Dracaena braunii) are suitable too. The stem-cuttings of these plants can even be inserted directly into the moss-covered spheres and allowed to establish and grow. As for the moss, you can buy Christmas Moss (Vesicularia montagnei) from aquariums. This particular moss comes as large sheets which can be cut up for kokedama projects.
Materials
The example shown here uses a floral foam ball in place of soil.
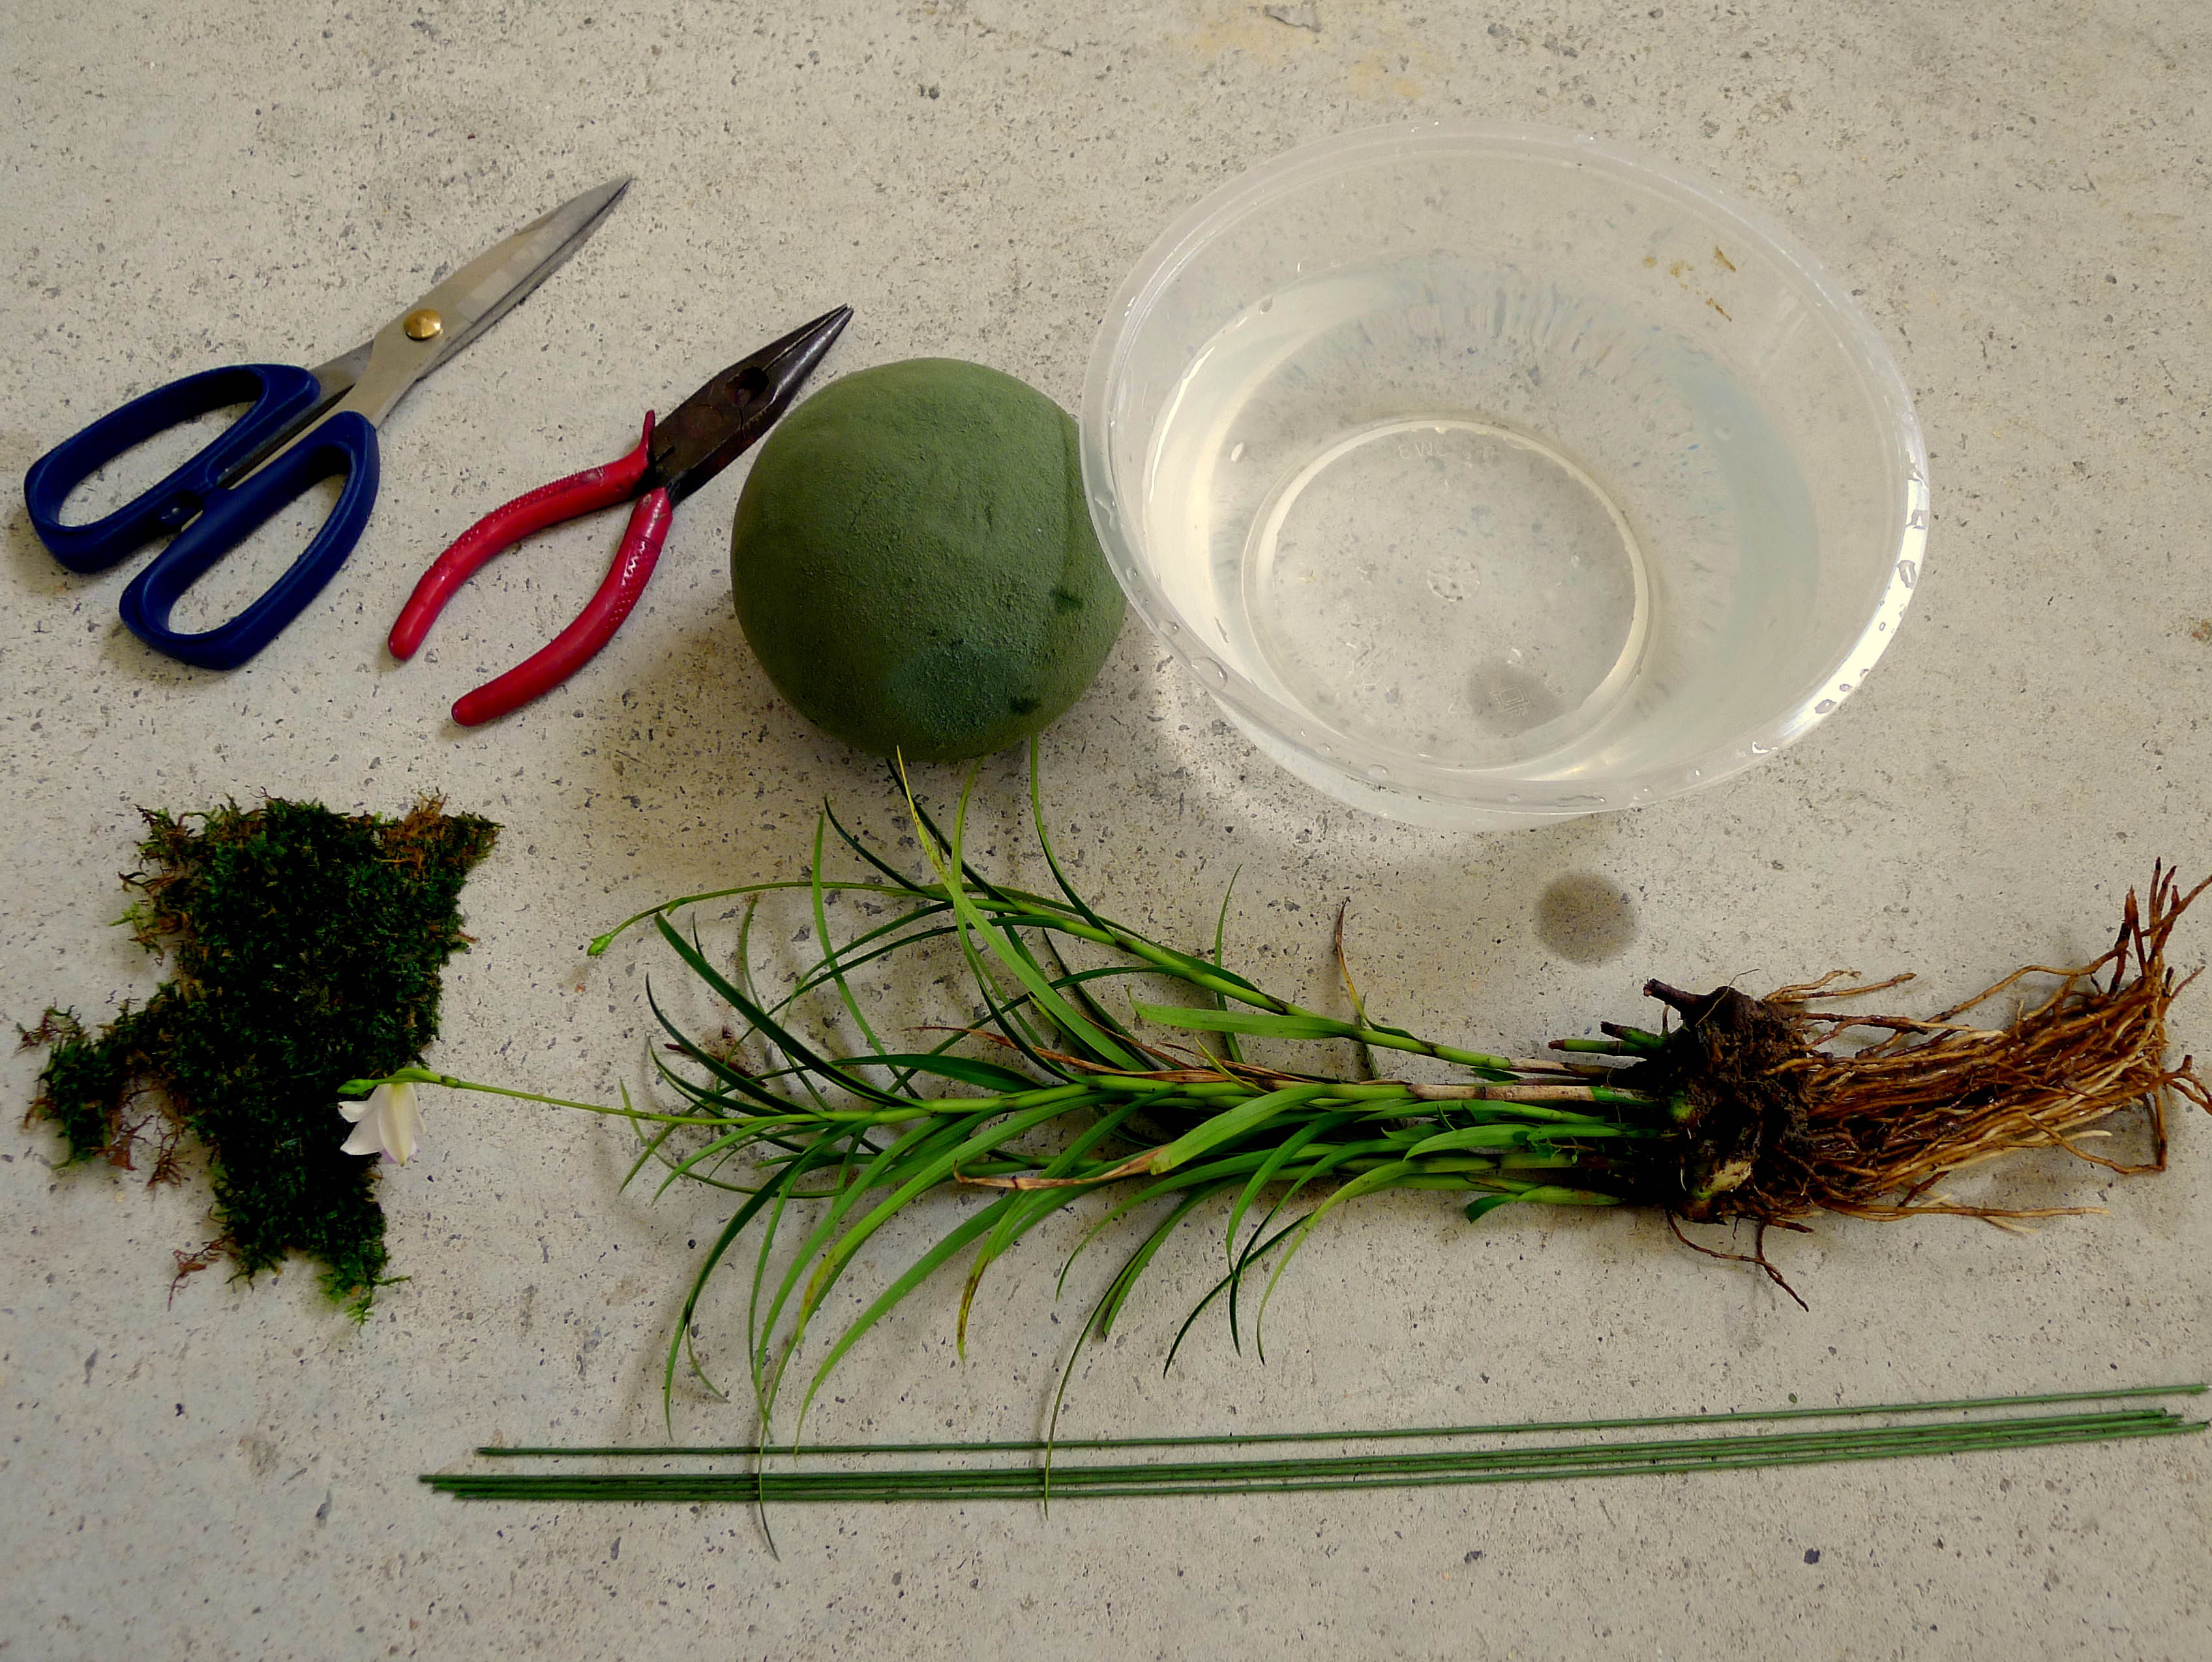 To make a kokedama moss ball, you will need to have a pair of scissors, a pair of sharp-nosed pliers, a floral foam sphere, some water, Christmas moss, thick floral wires and a plant of your choice. For this project, we used a dwarf cultivar of the bamboo orchid (Arundina).
Step 1 First start by soaking the floral foam sphere in water, making sure it is well saturated.
Step 2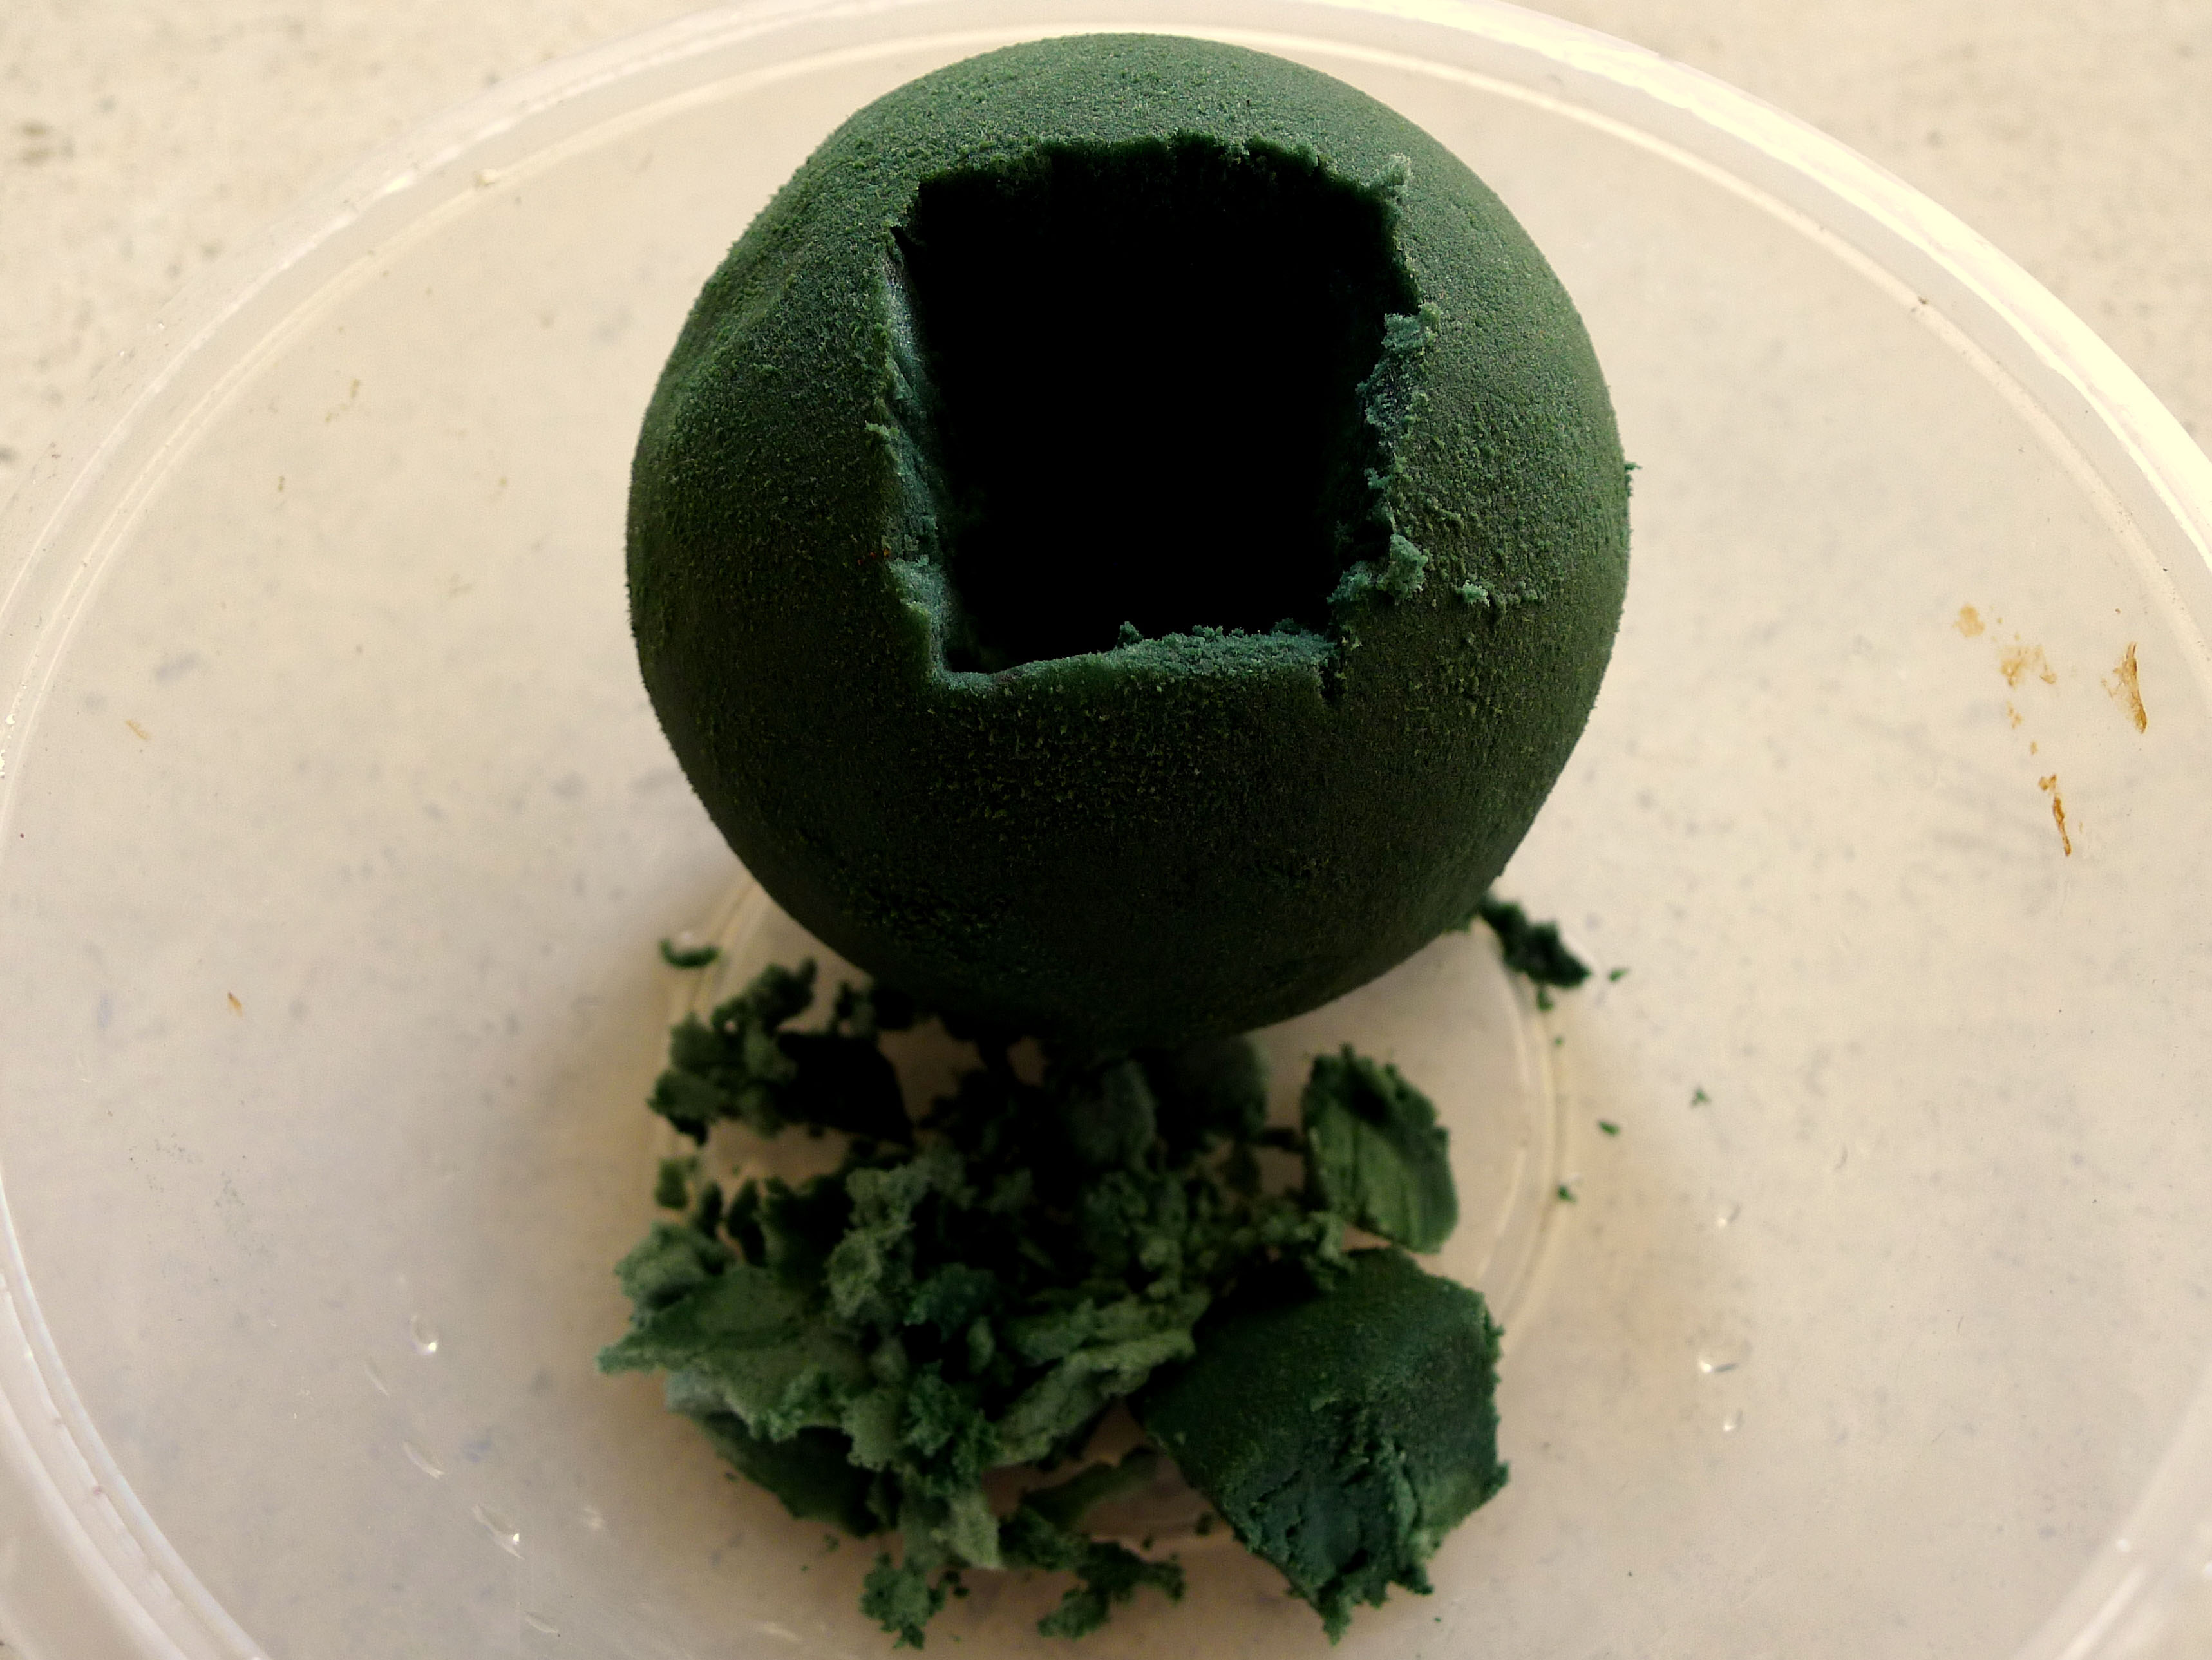 Cut out a hole using a pair of scissors. The size of the hole depends on the size of the plant’s root ball.
Step 3 Using a pair of pliers, cut thick floral wires into smaller pieces and bend them into U-shaped hooks.
Step 4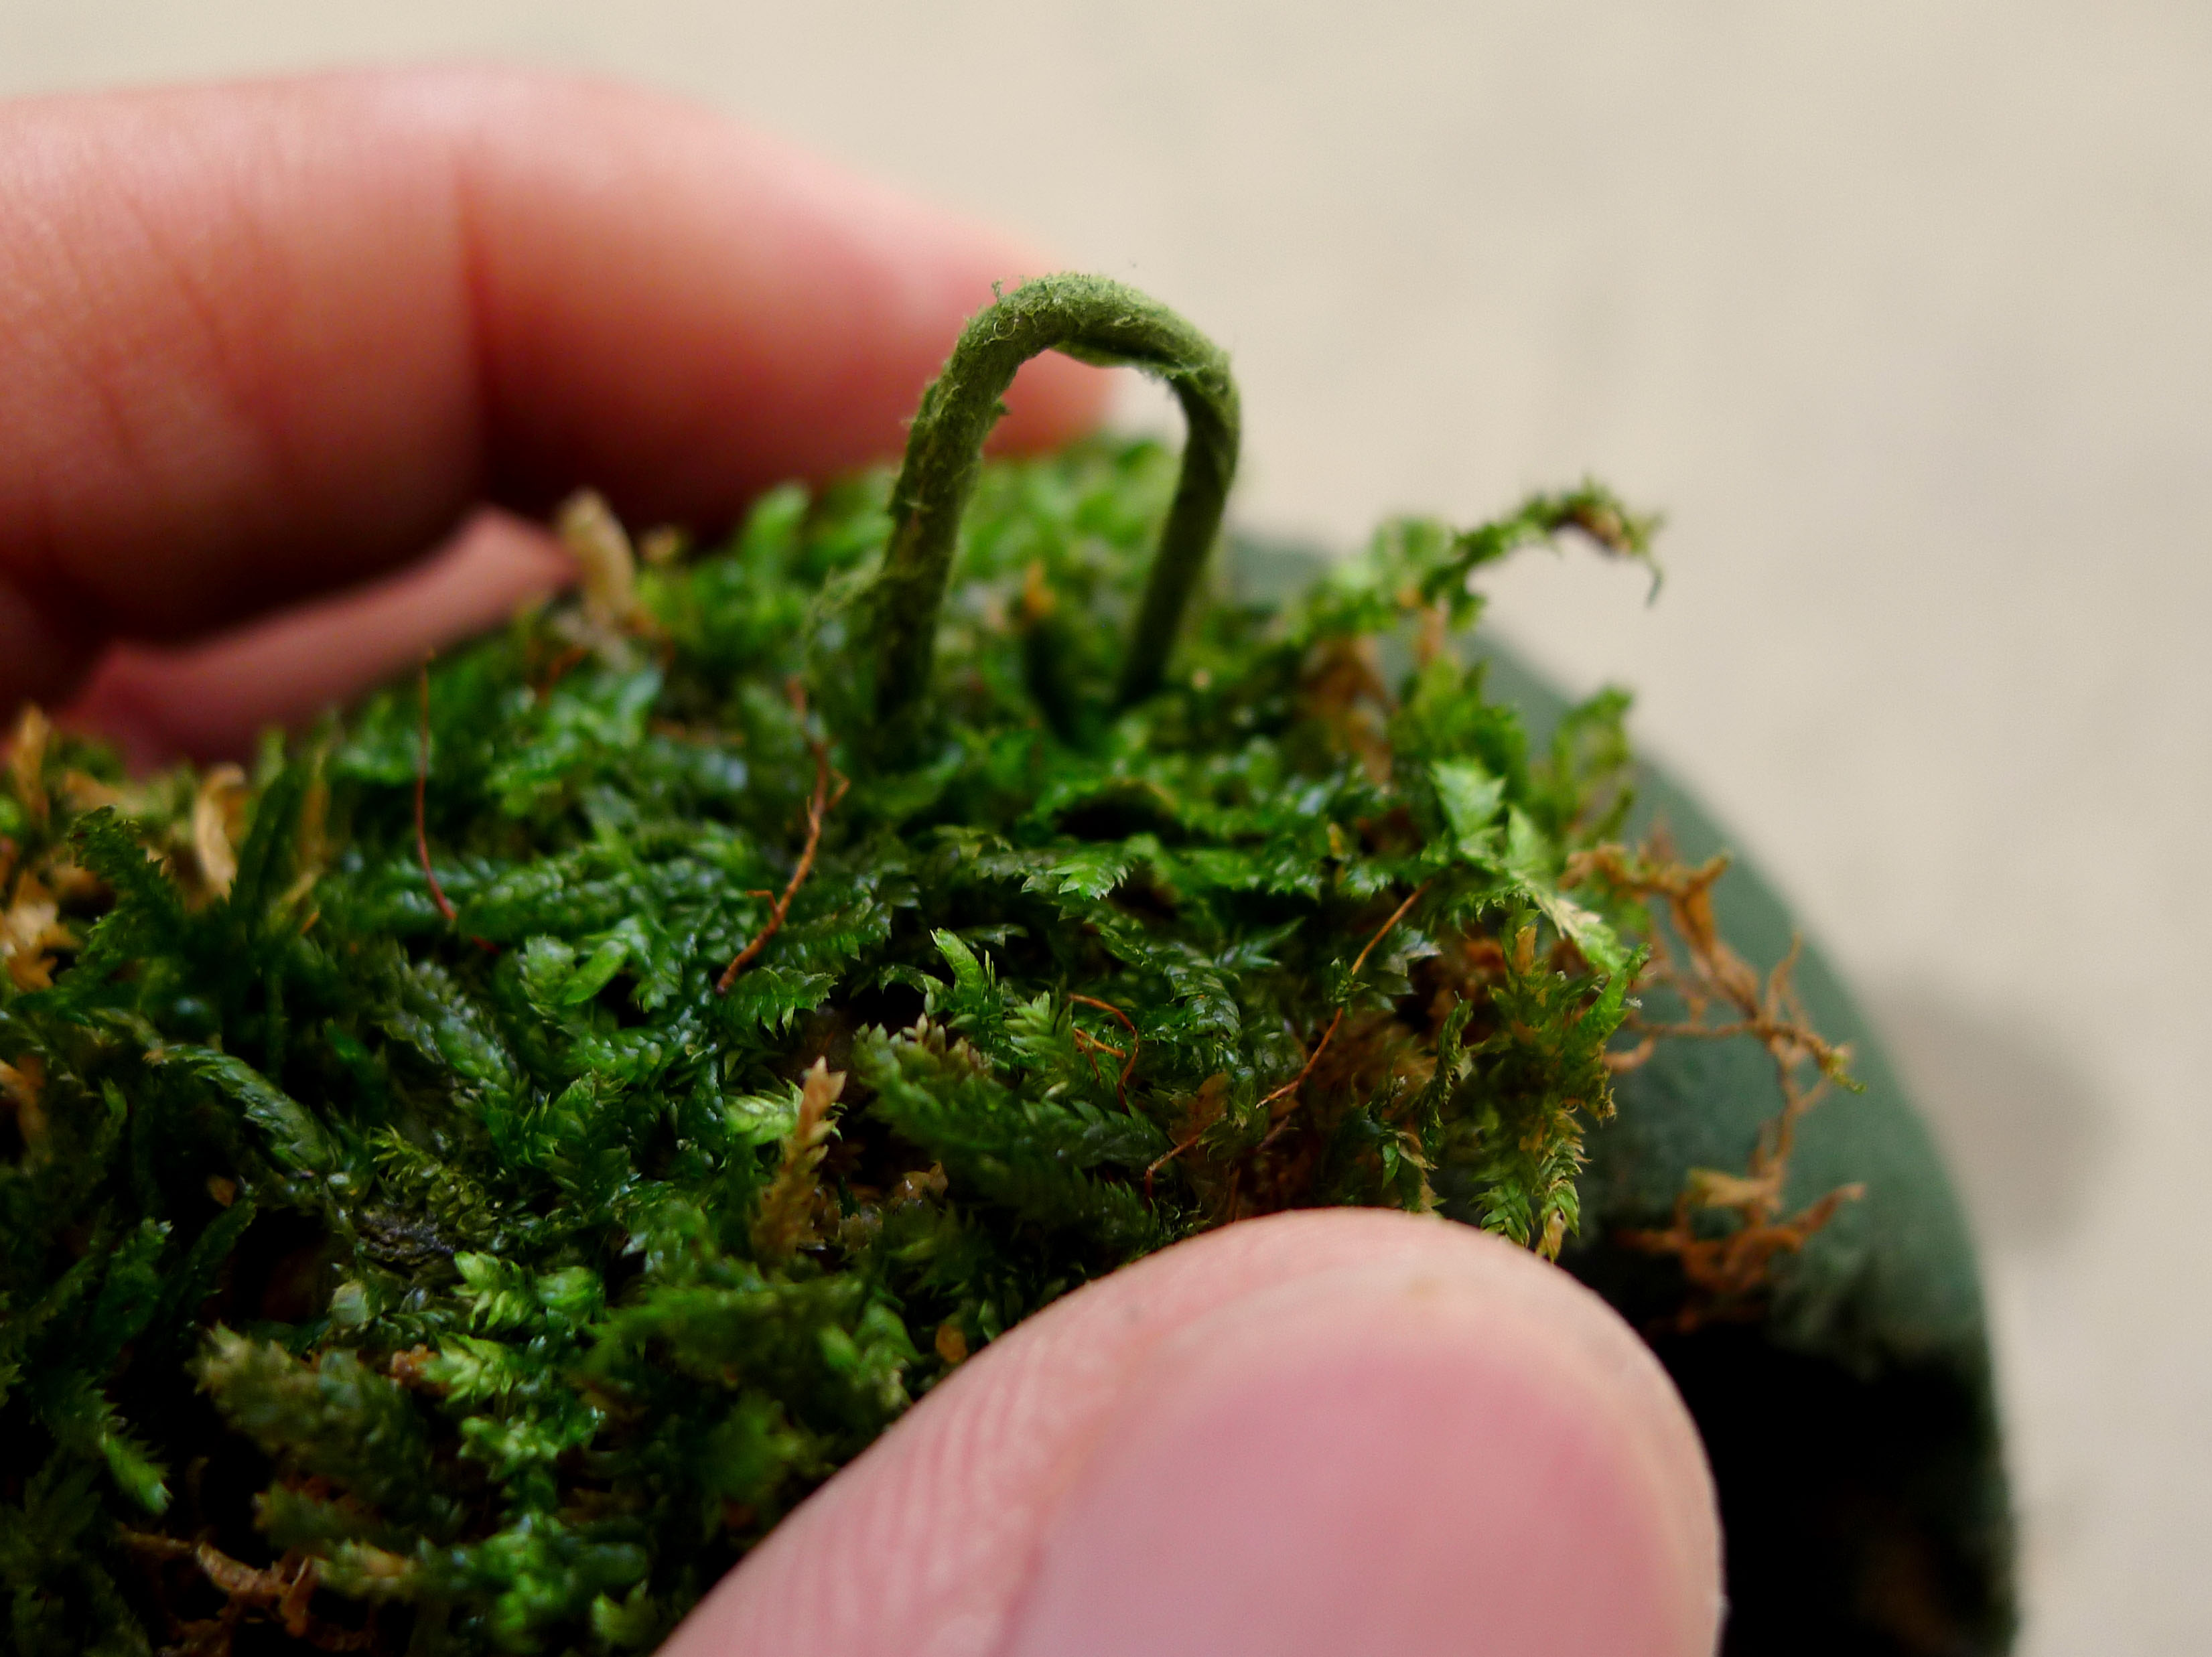 Use the U-shaped hooks to secure the Christmas moss onto the floral foam sphere. Traditionally, strings are wound round the sphere to hold the moss and soil ball together.
Step 5 If the ball is going to be displayed on a platform, you can omit covering the base of the ball. However, if your intention is to suspend the ball in mid-air, then you should cover the whole ball with moss.
Step 6 Insert the desired plant into the hole in the floral foam sphere. To secure the plant in place, you can use some leftover bits and pieces of floral foam, before inserting some moss around the planting hole to hide the foam and plant roots.
Step 7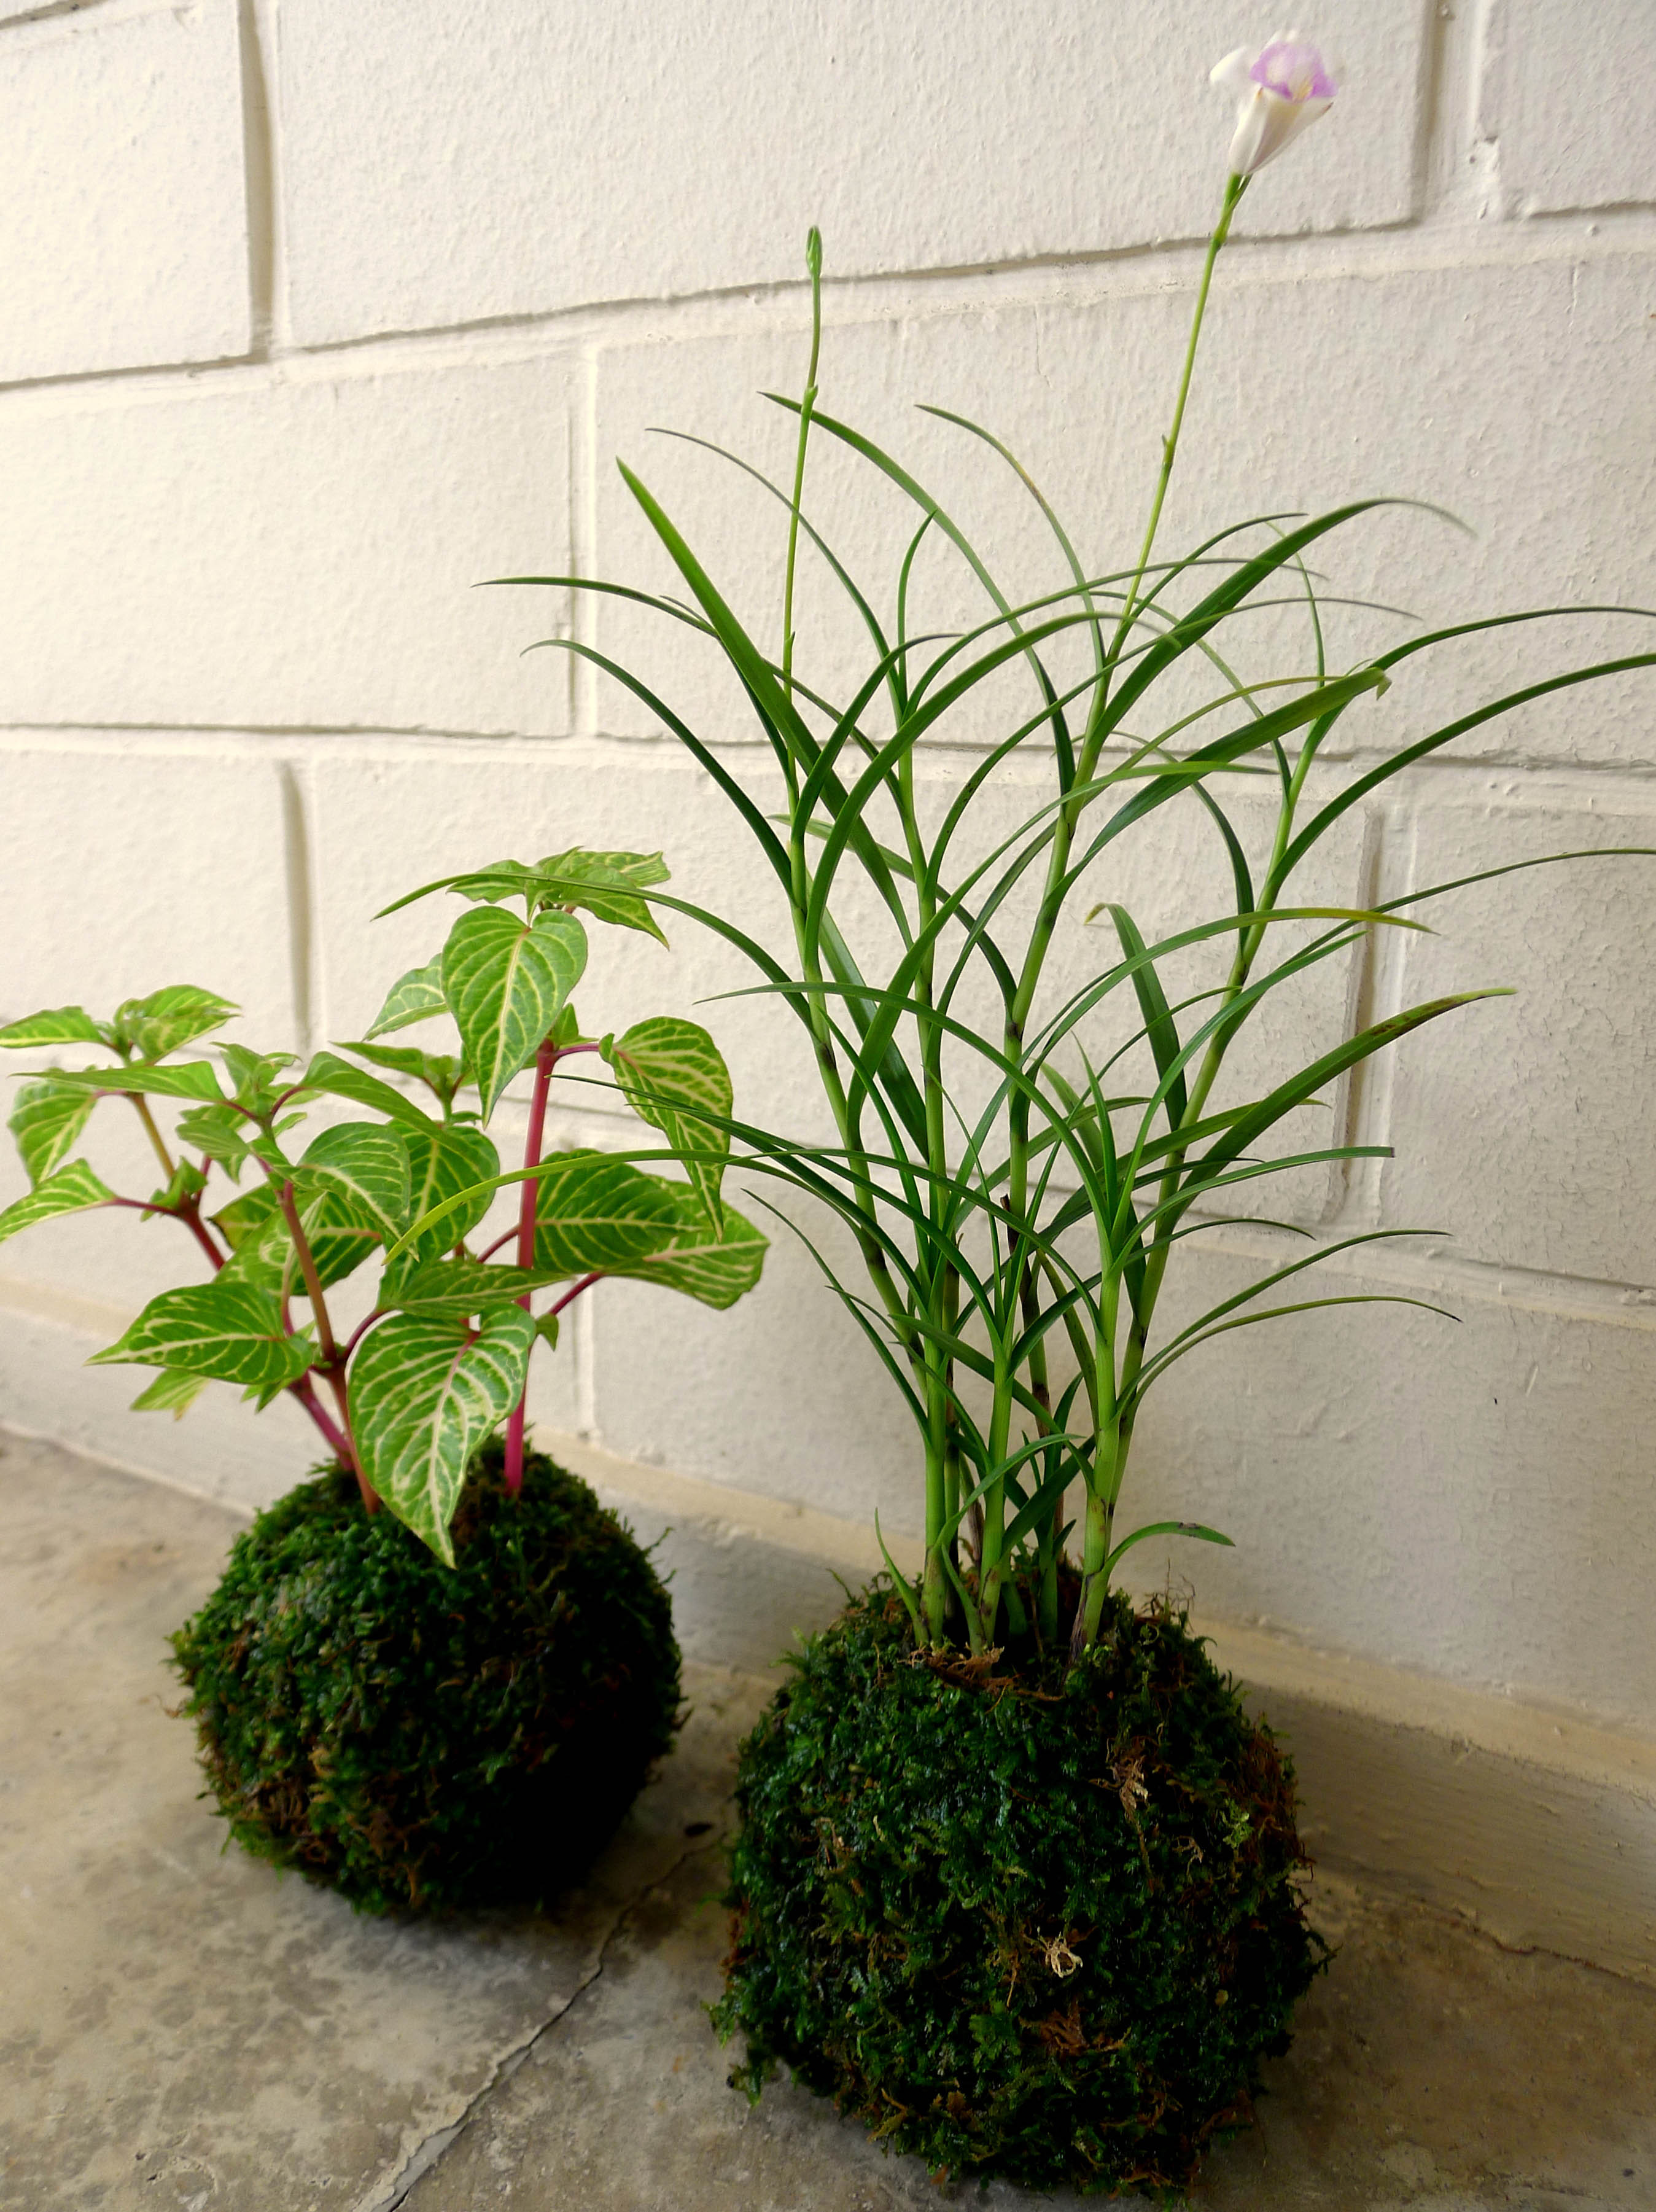 The finished product next to a moss ball holding a Iresine herbstii ‘Aureoreticulata’ plant. You should keep the moss ball moist at all times as moss does not like to dry out. Although it is a low light plant, moss grows best in a semi-shaded area, preferably exposed to 4 to 6 hours of filtered sunlight daily.
By Dr Wilson Wong
Have views or comments on this article? Let us know via this form. If you would like to give us feedback on any other areas relating to our parks and gardens, please submit via https://www.nparks.gov.sg/feedback